Cannabis deficiencies and other cannabis leaf symptoms can be a headache for any grower. Luckily, many weird weed leaf spots, marijuana leaves turning yellow, the whole marijuana plant turning yellow, and other strange cannabis leaf deficiencies can be fixed by getting a good nutrient system that is formulated for plants like the tomato.
Although cannabis nutrient deficiencies can be prevented with good cannabis-friendly nutrients (learn which nutrients work for preventing marijuana deficiencies) it’s also important to maintain a proper pH in order to prevent marijuana nutrient deficiencies and weed leaf symptoms. If you’re using good cannabis nutrients but you’re still seeing cannabis leaves with spots or cannabis leaves turning yellow, it’s probably the pH so act immediately!
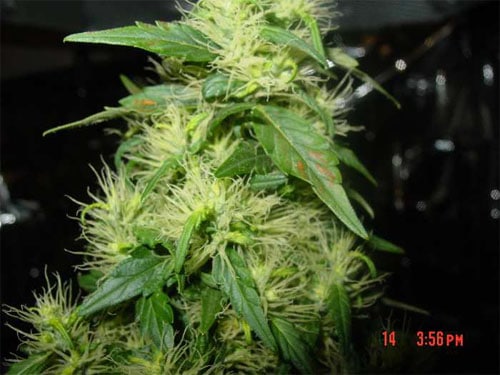
View pictures and descriptions below of all the common marijuana nutrient deficiencies, marijuana problems and other weed leaf deficiencies. Don’t let weed growing problems hurt your plants, get the solutions!
What Causes Plants to Grow Smooth Leaves?
What does it mean to accidentally “re-veg” a cannabis plant? “Re-veg” is short for “re-vegetation” and refers to what happens if a plant that has started flowering re-enters the vegetative stage. The majority of cannabis plants are photoperiod strains, which need long nights in order to make flowers/buds (indoor growers typically give 12 hours of uninterrupted darkness a day). If the plant starts getting light during its night time it responds by re-vegging.
Sometimes even just a little light like a blinking LED in your grow tent is all it takes to interrupt your plant’s beauty sleep.
Re-vegging happens when flowering plants get light during their 12-hour dark period. A few interrupted nights or even a small light leak can start a re-veg!
Re-vegging cannabis plants show odd leaf symptoms such as:
- smooth leaf edges
- buds stop developing
- long leaves or new stems grow out of bud sites
- main stem sprouts 1-point leaves (just one “finger” per leaf instead of the typical 7 or 9 for adult cannabis leaves)
- curling leaves (may look like heat stress)
- wrinkled, twisted, or unusual growth
This plant was put outside too early in the Spring season, which caused it to start flowering due to the short nights. As Spring progressed the nights grew shorter and it began revegging, growing these oddly smooth leaves directly out of the center stem.
Unusual single-point leaves started growing out of the developing buds of this plant in the middle of the flowering stage. The grower didn’t realize that turning the light on for a few moments during the dark period could cause a problem. If the plant is getting light at night, it only takes a few days to “flip the switch” and initiate the re-vegging process!
Some revegging symptoms include wrinkling, curling, or twisted leaves. These symptoms may be confused for watering, heat problems, or even broad mites, when they’re actually a sign the plant is going through major internal changes. Notice the wrinkled leaves in this picture are more smooth around the edges than typical leaves. That’s a key sign this plant is re-vegging.
This plant was already flowering indoors, but when it was brought outside in the spring, the short nights caused it to start re-vegging almost immediately.
These clones were recently taken from a flowering plant and have started re-vegging, causing odd growth and some smooth-edged leaves. Like many of the other cases of re-vegging, you can also see several single-point leaves among the new growth.This outdoor plant started re-vegging, resulting in odd, twisted growth as well as smooth single-point leaves with long stems
This plant was given a 12/12 light schedule after germination and buds (white hairs) started to form. The grower realized he wanted a bigger plant so he switched to a 20/4 light schedule so the plant would re-veg. Buds stopped developing and single-point leaves started growing out of the buds. Although you can still see a few white hairs, it is almost fully back into the vegetative stage at this point.
Sometimes marijuana growers choose to re-veg their plants purposely, for example monstercropping (taking a marijuana clone from a plant in the flowering phase in order to change the clone’s initial growth patterns) or to harvest a plant for a second time (put it back into the vegetative stage and grow the whole plant out again after harvest, sometimes used by outdoor growers in warm climates to get a second harvest in a year).
Unfortunately, most of the time a grower sees the tell-tale leaves of a re-vegging plant, it’s an unwelcome sight!
What to Do About Accidental Re-Vegging
When a plant is revegging, you basically only have two choices.
- Let it re-vegetate completely if you actually want the plant to be in the vegetative stage, or…
- Correct the light periods by getting rid of any possible light leaks and giving plants 12 hours of interrupted darkness a day (to get them to go back into the flowering stage).
Plants that are far in the flowering stage can take a month or more to re-veg, while a plant that has only just started flowering re-vegs much faster. That goes both ways. If a plant has been re-vegging for a long time, it may take a few weeks to get the plant back to flowering and developing buds.
Luckily, a little time and proper care will get your plant growing normally again!
This cutting was taken off a flowering marijuana plant and put in a cloning device so it would re-develop roots and grow into a new plant. After a few days of growing, it started producing the typical rounded leaves of a re-veg.About two weeks later, the plant is growing (mostly) normal leaves. Cannabis plants tend to grow a lot of stems and get bushy immediately after a re-veg, which can be seen heree. Although the growth patterns were odd at first, from this point on, the plant usually has relatively typical growing patterns.If you see your cannabis plant re-vegging, don’t panic! Figure out whether you want your plant to be in the vegetative or flowering stage and act accordingly. A little time is all it takes after that to get your plant in tip-top shape again.
Boron Deficiency
Problem: A boron deficiency in cannabis is relatively rare unless a plant is underwatered or in a really dry environment, and is usually accompanied by other types of nutrient or pH problems that appear as problems with the leaves.
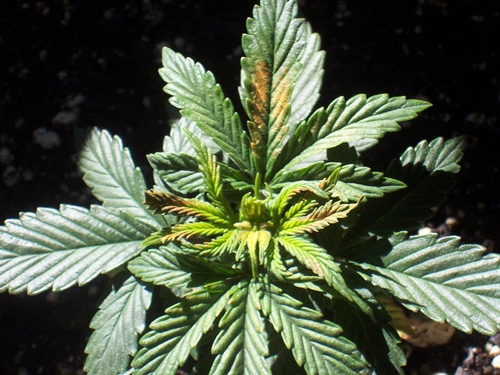
The first signs of a cannabis boron deficiency is abnormal or thick growth tips along with brown or yellow spotting on new leaves.
With a boron deficiency, upper cannabis leaves display abnormal and/or slowed growth. Growing tips may not grow properly, may display twisted growth, and may die off. New leaves may wrinkle or curl.
Plant roots can also be affected by a boron deficiency, showing unhealthy or slow growth. Stems may become rough or hollow. Boron deficiencies are more likely to appear when a plant is underwatered or experiencing very low humidity (very dry air).
A plant with a boron deficiency may look like it has a calcium deficiency because boron is needed for the plant to properly use calcium. New growth is affected the most, and may look like it’s been burnt or scorched. A boron deficiency is often accompanied by an apparent potassium or nitrogen deficiency, as these nutrients are needed for the plant to use boron.
Solution for Boron Deficiency in Cannabis
Note: Sometimes a cannabis boron deficiency (like all deficiencies) can be triggered by stressful conditions and may clear up on its own after the period of stress is over.
1.) Use Good Sources of Nutrients
Most cannabis growers don’t need to add more nutrient. In fact, most growers have actually already given plenty of boron to their cannabis plants, whether they meant to or not. If you’re using quality soil or cannabis-friendly nutrients, you probably don’t need to worry about adding more boron. Boron deficiencies are generally more likely to appear when a grower is using heavily filtered or reverse osmisis (RO) water to feed plants, since boron is found in most tap water, but that’s actually not the most common reason growers see boron deficiencies in their cannabis plants! As long as you’re giving your plants a good source of nutrients, you probably need to…
2.) Adjust pH to Correct Range
But the reason most growers see boron deficiencies is because boron is best absorbed at lower pH ranges. When the pH gets too high, your plant may exhibit signs of a boron deficiency even if it’s physically there near the roots.
In soil, boron is best absorbed by the roots in the 6.0 – 6.5 pH range (in soil, it’s generally recommended to keep the pH between 6.0 – 7.0, but boron specifically tends to be best absorbed below 6.5).
In hydro, boron is best absorbed by the roots in the 5.5 – 6.2 pH range (in hydro, it’s generally recommended to keep the pH between 5.5 – 6.5, but boron specifically tends to be best absorbed below 6.2).
3.) Give Plants Enough Moisture
Boron is not absorbed well if there isn’t enough moisture, for example if plant is underwatered or humidity is very low (below 25% relative humidity in the air). Proper watering practices will help prevent underwatering, and a humidifier may be needed to achieve the best growth if your grow room is very dry.
4.) Watch Leaves for Recovery
If you suspect your growing cannabis plant has a boron deficiency, flush your system with clean, pH’d water that contains a regular dose of cannabis-friendly nutrients. Old damaged growth will likely not recover. Watch plant over next few days to make sure that the problem stops spreading to new growth.
If you suspect your growing cannabis plant has a boron deficiency, flush your system with clean, pH’d water that contains a regular dose of cannabis-friendly nutrients. Old damaged growth will likely not recover. Watch plant over next few days to make sure that the problem stops spreading to new growth. Hope it helps!