Grinding your weed before smoking is a crucial step in the consumption process. Using a grinder gives you an even and consistent burn when you’re smoking, maximizes efficiency, and lets you get the most smoke out of your bud. While you can always pick apart your weed with your fingers, using a specialized herb grinder is by far the best way to break your cannabis down into smaller, more smokable pieces.
There are a few different types of weed grinders. The first and simplest model is a single chamber with metal grinding teeth and a lid that either snaps or screws into place. The underside of the lid also has grinding teeth that work in tandem with the teeth inside the main chamber. To use this type of weed grinder, simply press a couple of nugs down into the grinding teeth, put the lid on, and twist. As you twist, the grinding teeth in the main chamber and on the lid chop the herb into small, uniform pieces.
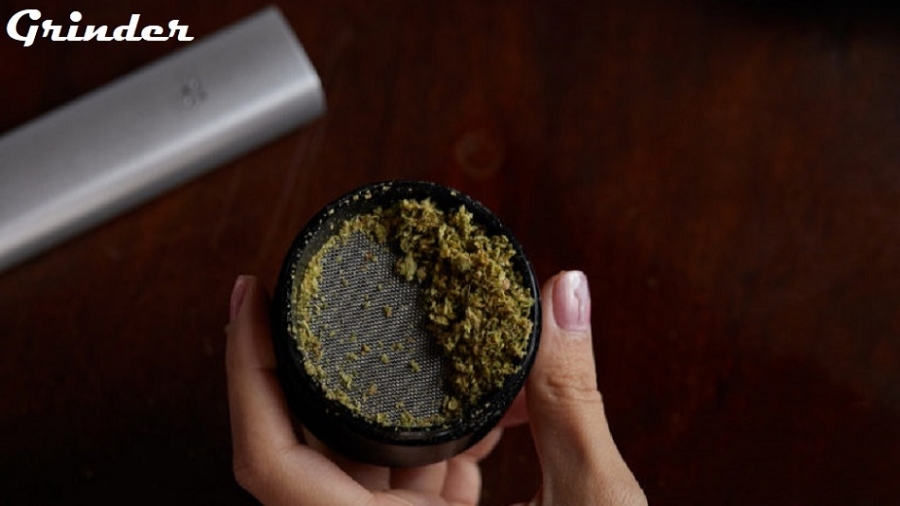
In addition to this simple, single-chamber design, there are grinders that function in a similar fashion but that include multiple chambers stacked onto each other. The top chamber contains the grinding teeth where you place your nugs before twisting the lid back and forth to break up the herb. There are a series of holes in the bottom of this top grinding chamber, through which the herb falls into a catch located directly beneath the grinding teeth. To access the ground-up herb, unscrew the catch chamber from the grinding chamber and pinch or dump out the herb you’re going to use.
Multi-chambered grinders typically have a mesh screen across the bottom of the catching. The screen filters out the chunks of plant matter from the much finer, powdery kief, which falls through the screen and into a kief catcher. Some grinders have multiple screens to separate out the super fine grains of kief from the larger grains of kief. Either way, these multi-chambered grinders allow you to isolate and keep the cannabinoid-rich kief for future use.
Finally, some weed grinders use rotating blades rather than grinding teeth. These grinders can produce a more uniform final product, as the blades cleanly slice the herb rather than forcefully grinding it apart into small chunks.
What you need to clean a grinder
The problem with grinders is that they eventually get gunked up with small pieces of plant matter, powdery kief, and sticky resin. When this happens, the lid can get stuck and difficult to work with, and it can be a challenge to rotate the grinding teeth or cutting blades back and forth. When this happens, it’s time to clean your grinder. Here’s everything you’ll need to get your grinder into like-new condition:

- Your dirty grinder
- A toothpick
- A small, soft-bristled brush
- A freezer
- A plate or bowl
- Isopropyl alcohol
- A toothbrush or some other type of stiff brush
- A Ziploc bag or glass jar
- Clean water
- A towel
How to clean a grinder: Step-by-step process
There are two main ways to clean a grinder. The first way is faster and simpler but won’t allow you to save the plant material leftover in the grinder. The second way takes a bit longer and requires some extra steps but will let you harvest some potentially potent residue for future use.
Method 1: Quick clean your grinder
Step 1: Disassemble the dirty grinder
Begin by taking apart and separating each chamber of your grinder. At this point, you can quickly harvest a little bit of leftover plant material by dumping out and saving as much of the loose leftovers as you can.
Step 2: Soak the grinder in alcohol
Place the grinder into a container of some sort—a Ziploc bag or large glass jar work best. Fill the container with enough isopropyl alcohol to fully submerge all parts of the grinder. Let the grinder soak for 20-30 minutes and agitate the container every once in awhile to help break apart plant residue.
Step 3: Scrub the grinder
Pour out the alcohol and use a stiff-bristled brush to scrub your grinder. Don’t forget to wash each chamber, scrape along the grinding teeth, and scour the lids.

Step 4: Rinse and dry the grinder
Use clean warm water to rinse your grinder thoroughly. Be sure to wash away all alcohol and any remaining plant material. Dry off your grinder with a clean towel. Once the grinder is completely dry, you’re ready to start grinding again.
Method 2: Deep Clean Your Grinder
Step 1: Disassemble the dirty grinder
If your grinder is so clogged up with plant residue that it’s hard to get a smooth back-and-forth grinding or slicing motion, it’s time to deep clean it. Start by disassembling the grinder and removing each chamber from the others. As you do this, be careful that you don’t spill any of the plant matter that’s left over inside the chambers.
Step 2: Dump out residue
Dump out leftover plant matter onto a plate or into a bowl. You’ll save this material for later use. At this point, you’re simply trying to harvest the stuff that’s only loosely caked into the grinder; don’t worry about the material still clinging to the chambers of your grinder. You’ll take care of that in the next step.
Step 2.1: Freeze the grinder
Arrange each piece of the grinder to sit upright inside the freezer. Leave the grinder in the freezer for at least 30 minutes. Freezing the plant residue this way makes it stiffer and, as it freezes, it will start forming into small clumps rather than clinging tightly to the grinder, all of which simplifies the scraping of the residue out of the grinder.
Step 3: Harvest plant residue
Remove the grinder from the freezer. Use a toothpick and small soft-bristled brush to gently scrape away as much of the plant material as you can. As before, use your plate or bowl to collect everything. Remember to scrape around the edges of all the chambers, along the sides of the grinding teeth, and around the circumference of each chamber’s lid. Most of this plant residue—especially the powdery kief—is incredibly rich in cannabinoids and very potent, so be sure you keep everything you harvest for future use.
Step 4: Soak in alcohol
When you’re satisfied that you’ve harvested as much of the leftover plant material as you possibly can, it’s time to make your grinder spotless. Place each chamber inside a large Ziploc bag or a glass jar. Fill the container with enough isopropyl alcohol to fully submerge the grinder. Let everything soak for at least 20 minutes. Every once in a while, give the container a gentle swirl to help break apart any plant matter stuck to the grinder.
Step 5: Clean off remaining residue
Pour out the alcohol and remove the grinder from the container. Use a toothbrush or another stiff brush to scrub your grinder clean. In this step, you’ll get rid of the most tenacious residue—the stuff that’s really gunking up your grinder and making it hard to use.
Step 6: Rinse and dry
Finally, give the grinder a good rinse in clean hot water, making sure that all the alcohol and plant residue are gone. Use a clean towel to dry off the grinder, including inside the chambers and around the grinding teeth.
Step 7: Start grinding again
At this point, your grinder should be pretty much spotless—almost as clean as the day you first got it. You will immediately notice how smoothly the device rotates and grinds, and how much neater and more uniform your small chunks of herb will become. When your grinder is completely dry and in like-new condition, go ahead and load up a few nugs, grind them down, and enjoy your smoke.
I just soak mine for about 3 to 4 hours in basic isopropyl alcohol, then rinse in warm water. No need for a brush; it all loosens up and dissolves in the alcohol. Just did mine and it’s clean as new. No degradation of the glossy black paint or white logo at all.